

5 Secrets to the Perfect Oreo Dirt Cake – Quick & Delicious
Table of Contents
Introduction
Are you craving a delicious, no-bake dessert that’s fun and easy to make? Look no further than the famous Oreo Dirt Cake! This irresistible dessert perfectly combines creamy, fluffy layers with crunchy Oreo cookie crumbs, creating a treat that kids and adults will absolutely love. Whether you’re planning a kids’ party, a family gathering, or just want a quick homemade indulgence, this step-by-step recipe will guide you to make the perfect Dirt Cake every time.
In this article, we’ll cover everything you need to know to make a flawless Oreo Dirt Cake:
- Essential ingredients that bring this dessert to life.
- Detailed preparation steps to ensure every layer turns out creamy and delicious.
- Tips and tricks to make your cake extra rich and flavorful.
- Creative serving ideas that make your dessert visually stunning and fun for kids.
You don’t need to be a professional baker to create this amazing dessert. With simple ingredients, a little time, and our easy guide, you can make a dessert that’s creamy, chocolatey, and irresistibly tasty. By the end, you’ll have a show-stopping treat that’s perfect for any occasion, from casual family nights to festive celebrations.
Get ready to enjoy the magic of Oreo Dirt Cake, a no-bake dessert that will quickly become a family favorite. With this recipe, you’ll discover how a simple, easy-to-follow guide can transform basic ingredients into a dessert that’s fun, decadent, and absolutely unforgettable.
Why This Oreo Dirt Cake Recipe Works
What makes this Oreo Dirt Cake recipe truly effective and stand out from others is the perfect balance between simplicity and indulgence. Unlike other recipes that may rely on complicated techniques or hard-to-find ingredients, this version is 100% no-bake, easy to follow, and uses ingredients you likely already have at home.
Here’s why this recipe works so well:
- Creamy, luscious texture: By combining cream cheese, whipped topping, and pudding, every bite melts in your mouth, creating that classic dirt cake creaminess that everyone loves.
- Crunchy Oreo layers: Instead of overmixing or crushing the cookies too fine, this recipe keeps the Oreos slightly chunky, giving each spoonful a delightful texture contrast.
- Step-by-step guidance: Each step is clearly explained, so even beginners can create a perfect dessert without any guesswork.
- Quick and convenient: From start to finish, this cake comes together in under 30 minutes, making it ideal for last-minute parties or busy weekdays.
- Customizable and fun: You can easily add gummy worms, chocolate chips, or other toppings, making this dessert perfect for kids’ parties or festive occasions.
Unlike many other Oreo Dirt Cake recipes online, this version combines flavor, texture, and simplicity in a way that guarantees success every time. Whether you’re serving it to children or adults, this dessert always impresses—creamy, chocolatey, and irresistibly delicious from the first bite to the last.
Ingredients for Oreo Dirt Cake (Enhanced & Detailed)
To make the perfect Oreo Dirt Cake, you’ll need the following ingredients. Quantities are precise and tips are included to ensure the best results:
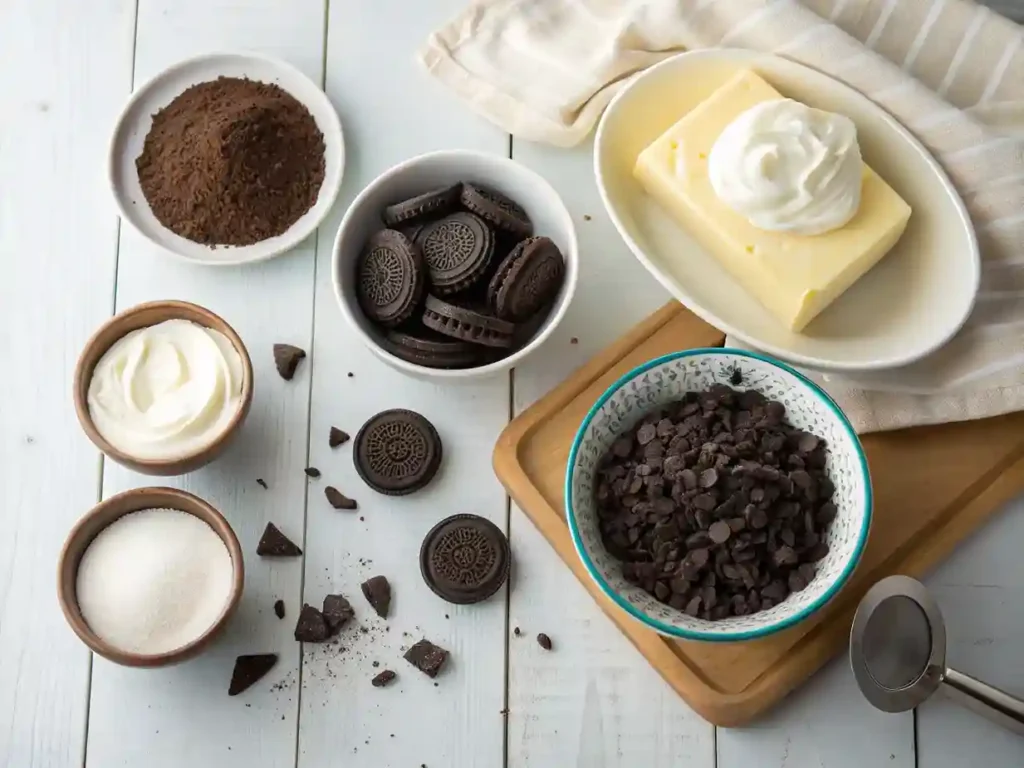
Base Layer (Oreo Crumbs)
- 24 Oreo cookies, crushed (leave some larger chunks for texture)
- 2 tablespoons unsalted butter, melted (helps the crumbs stick together if making a crust)
Creamy Filling
- 8 oz (225 g) cream cheese, softened to room temperature
- 1/2 cup (120 g) granulated sugar
- 2 teaspoons pure vanilla extract
- 2 cups (480 ml) heavy whipping cream, chilled
- 1 (3.4 oz / 96 g) package instant vanilla pudding mix
Additional Layers & Toppings
- 8–10 Oreo cookies, roughly chopped for layering between the cream
- Gummy worms (optional, for a fun dirt effect)
- Chocolate shavings or sprinkles (optional, for decoration)
Tips to Enhance Flavor & Texture
- For extra creamy filling, whip the cream cheese and sugar until super smooth before folding in the whipped topping.
- Crush Oreos by hand if you want a chunkier, more textured dirt effect.
- Chill the heavy cream for at least 30 minutes before whipping for best results.
- Layer carefully: alternate crumbs and cream for visual appeal and balanced flavor in every bite.
Step-by-Step Instructions for Oreo Dirt Cake
Follow these steps carefully to make a creamy, chocolatey, and perfectly layered Oreo Dirt Cake that will impress everyone.
Step 1: Prepare the Oreo Crumbs
- Place 24 Oreo cookies in a large ziplock bag.
- Using a rolling pin or a food processor, crush them into fine crumbs, leaving a few slightly larger pieces for texture.
- Optionally, mix 2 tablespoons of melted unsalted butter with the crumbs if you want to create a firmer base layer for your cake dish.
- Set aside the crumbs in a medium bowl.
💡 Pro Tip: Crushing by hand gives a chunkier, more “dirt-like” texture, which looks great and adds contrast to the creamy layers.
Step 2: Make the Cream Cheese Filling
- In a large mixing bowl, beat 8 oz (225 g) cream cheese until smooth.
- Gradually add 1/2 cup granulated sugar and 2 teaspoons vanilla extract, mixing until fully combined and creamy.
- In a separate chilled bowl, whip 2 cups heavy whipping cream until stiff peaks form.
- Gently fold the whipped cream into the cream cheese mixture using a spatula, being careful not to deflate the whipped cream.
- Add instant vanilla pudding mix (3.4 oz / 96 g) to the mixture and fold until fully combined for extra thickness and stability.
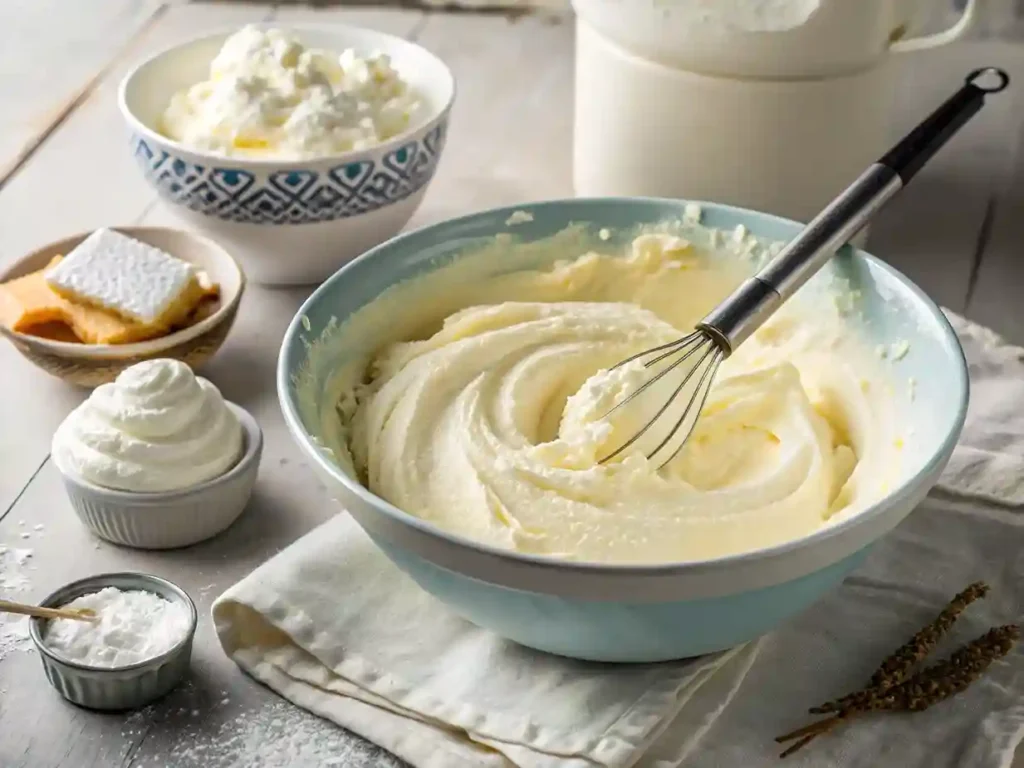
💡 Pro Tip: Ensure the cream cheese is softened to room temperature, otherwise it will form lumps when folded with whipped cream.
Step 3: Assemble the Layers
- In a 9×13 inch (23×33 cm) dish, spread half of the Oreo crumbs evenly on the bottom.
- Add half of the cream cheese mixture on top, spreading gently with a spatula.
- Sprinkle 4–5 roughly chopped Oreo cookies evenly over the cream layer.
- Repeat with the remaining Oreo crumbs and cream mixture for a second layer.
- Top the final layer with remaining chopped Oreos, chocolate shavings, or optional gummy worms.
💡 Pro Tip: Alternate layers carefully to create a visually appealing striped effect, ensuring every bite has both cream and crunchy Oreos.
Step 4: Chill and Set
- Cover the dish with plastic wrap.
- Refrigerate for at least 4 hours, ideally overnight, to allow the flavors to meld and the cake to set properly.
- Before serving, you can add a final dusting of Oreo crumbs on top for presentation.
💡 Pro Tip: Chilling overnight enhances the flavor and makes the cake easier to cut into neat slices.
Step 5: Serve and Enjoy
- Use a sharp knife or spatula to cut squares.
- Serve with a dollop of whipped cream, extra Oreos, or a few gummy worms for a fun dirt effect.
- Store leftovers in the refrigerator for up to 3–4 days.
💡 Extra Tip: This recipe can be scaled up or down for different pan sizes, making it perfect for parties or small family treats.
Tips & Tricks to Make the Best Oreo Dirt Cake
Making a perfect Oreo Dirt Cake is easier when you follow a few expert tips and tricks. These enhancements will help your cake stand out in taste, texture, and presentation, outperforming typical online recipes.
1. Use Fresh, Room-Temperature Ingredients
- Always let your cream cheese soften to room temperature before mixing.
- Chill the heavy cream before whipping to achieve stiff, airy peaks that give your filling a light, creamy texture.
2. Master the Oreo Texture
- For the best “dirt effect,” crush Oreos in varying sizes: fine crumbs for layering and larger chunks for a crunchy surprise.
- Avoid over-crushing to preserve texture contrast in every bite.
3. Perfect Your Cream Cheese Filling
- Beat the cream cheese thoroughly to remove lumps before folding in whipped cream.
- Fold gently to maintain fluffiness—don’t overmix or your cream may become dense.
- Add instant vanilla pudding mix for extra stability and creaminess; this keeps layers from becoming runny.
4. Layer with Care
- Alternate crumbs and cream evenly to ensure every bite has both flavors.
- Press down lightly on each layer to avoid air pockets, but don’t flatten completely—you want the cake to look fluffy and inviting.
5. Chill for Maximum Flavor
- Refrigerate for at least 4 hours, ideally overnight.
- Chilling allows the flavors to meld together, giving you a rich, indulgent taste and a cake that slices cleanly.
6. Add Fun and Customization
- Incorporate gummy worms, chocolate chips, or sprinkles for kids’ parties or themed events.
- Try a layer of crushed peanut butter cups or caramel drizzle for extra flavor twists.
- For a more adult-friendly version, add a touch of coffee or chocolate liqueur to the cream mixture.
7. Presentation Matters
- Use a clear dish to show off the layers for a visually stunning effect.
- Top with extra Oreos, chocolate shavings, or edible decorations right before serving.
- For party portions, serve in small cups or jars for easy handling and a fun presentation.
Serving & Presentation Ideas for Oreo Dirt Cake
A dessert is not only about taste—it’s also about visual appeal and presentation. These serving ideas will make your Oreo Dirt Cake the star of any table, impressing guests and kids alike:
1. Individual Portions
- Serve the cake in small jars, cups, or dessert glasses for neat individual servings.
- Layer the crumbs, cream filling, and chopped Oreos visibly to show off the “dirt” effect.
- Top each jar with a mini gummy worm or chocolate shard for a playful touch.
2. Party Platter Style
- Cut the cake into even squares and arrange them on a decorative serving platter.
- Sprinkle extra Oreo crumbs or chocolate shavings over the top for an appealing, textured look.
- Add gummy worms crawling over the cake to create a fun, interactive theme for kids’ parties.
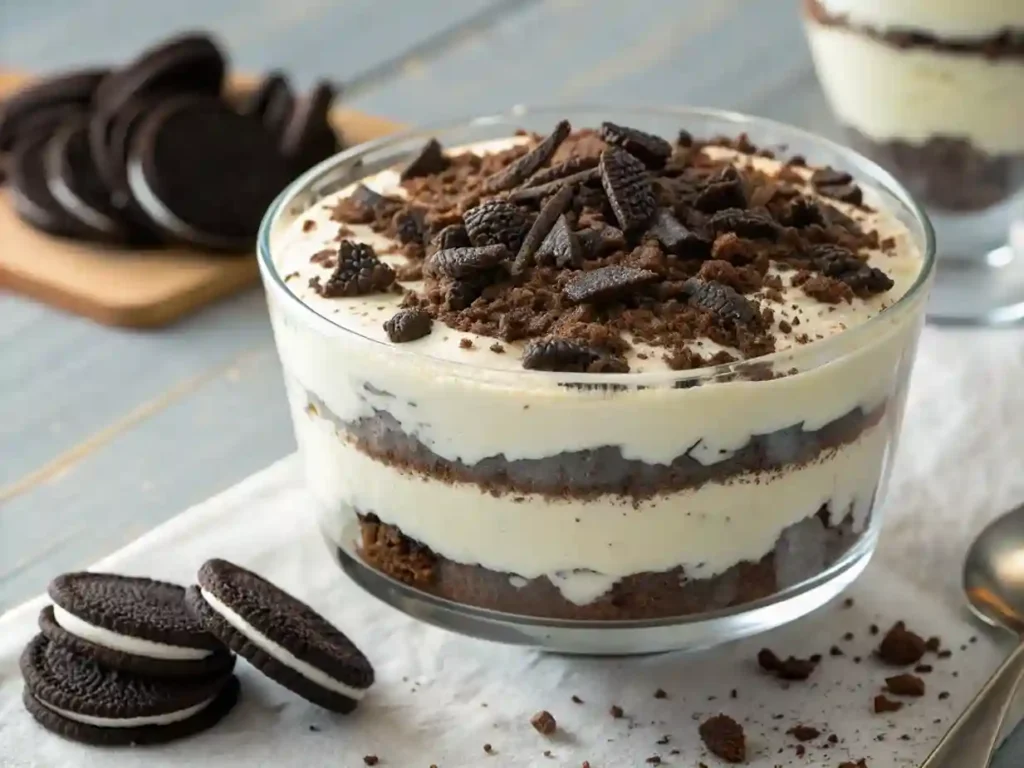
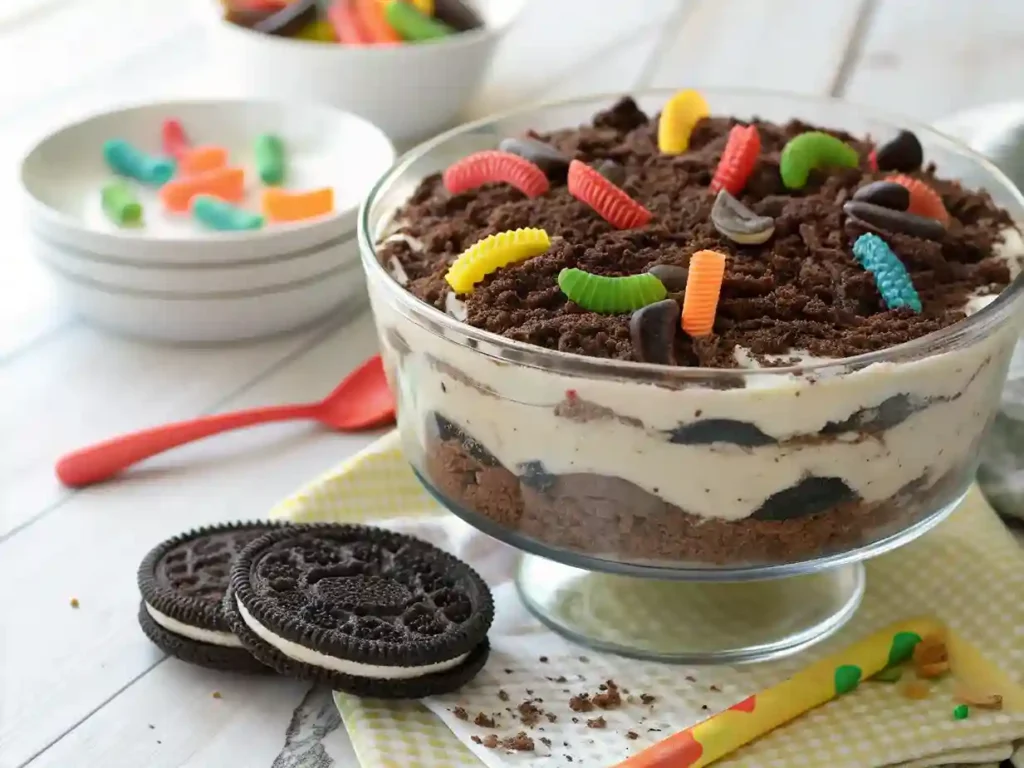
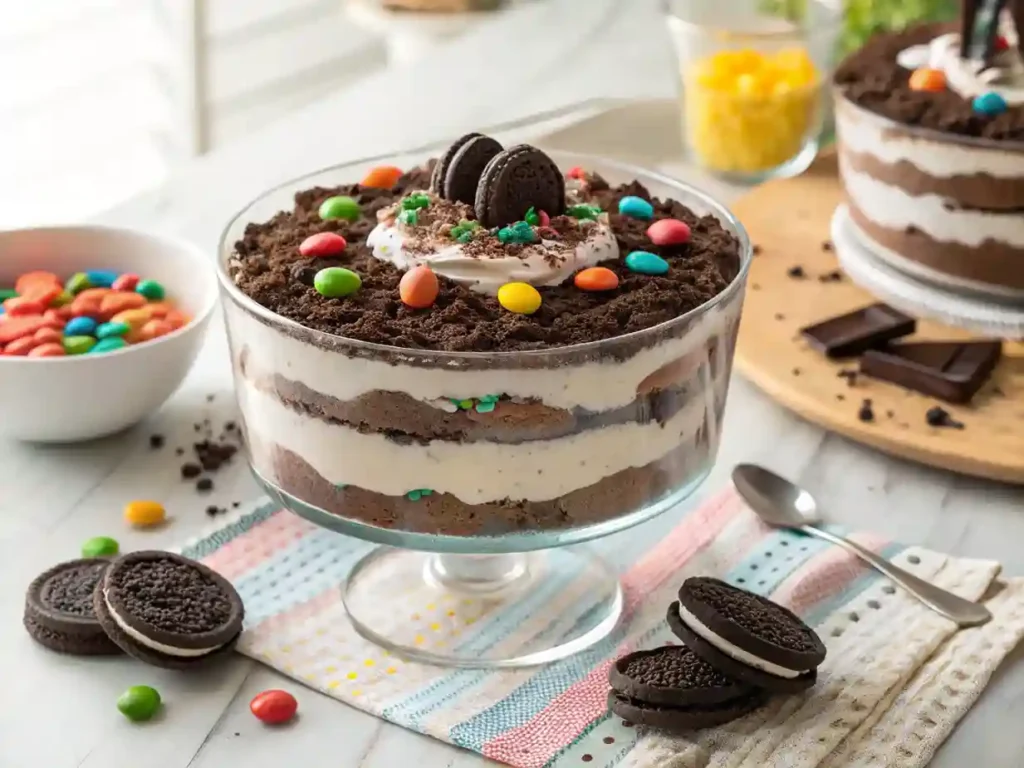
3. Layer Highlighting in a Clear Dish
- Use a clear glass or trifle bowl to show all the cream and Oreo layers.
- Alternate layers carefully for perfect stripes of cream and crumbs, making it visually stunning from the side.
- Top with decorative elements such as sprinkles, crushed candy, or edible flowers for a premium look.
4. Elegant Adult-Friendly Presentation
- For an adult twist, drizzle the top with caramel, chocolate sauce, or coffee-infused cream.
- Garnish with shaved chocolate or chopped nuts for a sophisticated finish.
- Serve on a white plate with a decorative drizzle to highlight the dessert in a restaurant-style presentation.
5. Seasonal & Themed Ideas
- Halloween: Add gummy worms, edible soil (extra Oreo crumbs), and candy pumpkins.
- Easter: Add pastel sprinkles, mini chocolate eggs, and colorful layers.
- Birthday Parties: Use candles, edible glitter, or personalized decorations to match the party theme.
How to Store Your Oreo Dirt Cake
Proper storage is essential to keep your Oreo Dirt Cake creamy, fresh, and delicious. Many competitor recipes only mention “refrigerate,” but here are optimized tips to maintain flavor, texture, and presentation:
1. Refrigeration
- Cover tightly with plastic wrap or use an airtight container to prevent the cake from absorbing other fridge odors.
- Store in the refrigerator for up to 4–5 days.
- For best results, slice only before serving to keep layers intact and avoid drying out.
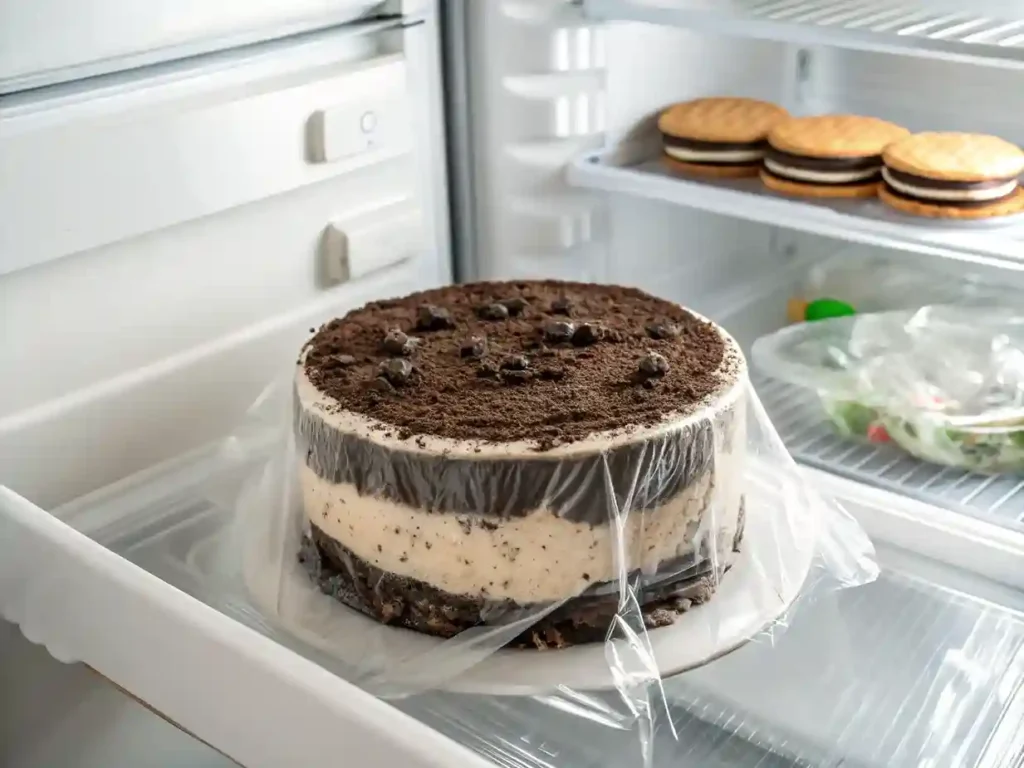
2. Freezing
- Oreo Dirt Cake can be frozen for up to 1 month without losing flavor.
- Use a layer of plastic wrap directly on the surface, then cover the entire dish with foil or an airtight container.
- Thaw in the fridge overnight before serving. This preserves the creamy texture and prevents condensation from making the Oreos soggy.
3. Individual Portions
- For jars or cups, cover each portion with a plastic lid or wrap.
- This method allows grab-and-go servings and maintains freshness for several days.
4. Tips for Maintaining Texture and Flavor
- Avoid leaving the cake at room temperature for extended periods, as the cream filling can soften too much.
- Do not freeze decorated toppings like chocolate shavings or gummy worms—they can melt or become sticky. Add these after thawing if freezing.
- For a fresh taste, consider adding a small layer of crushed Oreos just before serving to restore that “just-made” crunch.
Nutrition Information for Oreo Dirt Cake
Understanding the nutritional content of your Oreo Dirt Cake can help you enjoy it responsibly while still indulging in this delicious dessert. The following values are approximate per serving (assuming 12 servings from a 9×13 inch dish):
- Calories: 320 kcal
- Total Fat: 20 g
- Saturated Fat: 12 g
- Trans Fat: 0 g
- Cholesterol: 60 mg
- Sodium: 180 mg
- Total Carbohydrates: 35 g
- Dietary Fiber: 1 g
- Sugars: 25 g
- Protein: 4 g
Enhanced Nutrition Tips:
- Reduce calories by using low-fat cream cheese or light whipped topping.
- Lower sugar by using a sugar-free pudding mix or reduced-sugar Oreos.
- Add extra fiber by mixing in ground flaxseed or chia seeds into the cream layer (optional).
- Dairy-free option: Substitute cream cheese and whipped topping with vegan alternatives for lactose-intolerant guests.
Frequently Asked Questions (FAQ) About Oreo Dirt Cake
1. Can I make Oreo Dirt Cake ahead of time?
Yes! This dessert actually tastes even better after chilling overnight. The flavors meld together, and the cream layers set perfectly. Just cover tightly with plastic wrap and refrigerate for 4–24 hours before serving.
2. Can I use different flavors of Oreos?
Absolutely! While classic Oreos are traditional, you can experiment with Golden Oreos, Double Stuf, or flavored varieties. Just adjust the sweetness of the cream if the cookies are very sweet.
3. Is Oreo Dirt Cake suitable for kids?
Yes, it’s perfect for kids’ parties! For younger children, you can skip any alcohol or coffee additions and add gummy worms or sprinkles for a fun “dirt” effect.
4. Can I make it dairy-free or vegan?
Yes, with some substitutions:
- Use dairy-free cream cheese and coconut or soy whipped topping.
- Make sure the Oreos are vegan (most classic Oreos are, but double-check your brand).
- Instant pudding mix can also be replaced with a vegan-friendly thickener or homemade pudding.
5. How long does Oreo Dirt Cake last?
- In the refrigerator: up to 4–5 days in an airtight container.
- In the freezer: up to 1 month, but toppings like chocolate shavings or gummy worms should be added after thawing.
6. Can I make individual servings?
Yes! Serving in small jars, cups, or dessert glasses is not only cute and convenient, but also helps maintain freshness for longer periods.
7. Can I customize the flavor?
Definitely! You can add:
- Peanut butter or Nutella layers for a nutty twist.
- Caramel or chocolate drizzle for extra richness.
- Coffee, espresso, or liqueur for an adult-friendly version.
Conclusion
Creating the perfect Oreo Dirt Cake has never been easier! With this easy, no-bake, step-by-step recipe, you can enjoy a dessert that is creamy, chocolatey, and irresistibly delicious—perfect for kids’ parties, family gatherings, or a quick indulgence at home.
By following our enhanced tips, layering techniques, and presentation ideas, you’re guaranteed a cake that not only tastes amazing but also looks stunning on any dessert table. From precise measurements to chilling instructions and optional creative twists, this guide ensures that your Oreo Dirt Cake turns out perfectly every time, unlike many standard recipes online.
Whether you’re a beginner baker or an experienced dessert enthusiast, this recipe offers:
- Reliable results every time
- Fun customization for kids and adults
- A visually appealing, Instagram-worthy dessert
So go ahead, gather your ingredients, and create a show-stopping Oreo Dirt Cake that everyone will love. Don’t forget to share your creations with friends and family, and keep experimenting with toppings and layers to make this dessert uniquely yours.
Tip: Bookmark this recipe and check back for seasonal variations and creative twists—your Oreo Dirt Cake journey has just begun!