
cake popsicles recipe: 6 Fun Decorating Ideas for Kids
Table of Contents
What if you could turn leftover cake into a cool, fun treat that kids beg for?
Imagine dessert time where your little ones aren’t just eating—they’re creating magic on a stick! That’s exactly what happens when you make a cake popsicles recipe. These sweet, icy treats are like cake bites dipped in chocolate and decorated with sprinkles, candies, and glitter. Perfect for birthdays, summer days, or just a fun afternoon snack
Why This Cake Popsicles Recipe is a Winner
The best part about this cake popsicles recipe is how easy it is—even young helpers can join in! It only takes about 45 minutes to make (plus chilling time), and the difficulty level is super beginner-friendly. You don’t need fancy tools or baking skills. Just a few basic ingredients, some creativity, and a little imagination!
This recipe is perfect for families who want to enjoy cooking together. Plus, it’s a great way to use up leftover cake or try a new twist on a classic favorite. And yes—these popsicles stay cool and delicious, making them ideal for warm days or summer playdates .
What You’ll Need: Essential Ingredients
Here’s what you need to get started:
- 1 box of cake mix (any flavor—chocolate, vanilla, red velvet, or lemon!)
- 1/2 cup of frosting (vanilla or chocolate work well)
- 2 cups of candy melts or melting chocolate (white, dark, or colored)
- Lollipop sticks (available at craft stores or online)
- Sprinkles, mini candies, edible glitter, or other fun decorations
Why these ingredients matter:
The cake mix gives the base flavor and texture. The frosting helps bind the crumb together so it holds its shape. The melted chocolate creates a smooth, crunchy coating that hardens when cooled. Lollipop sticks let you hold the treat without getting sticky fingers. And the decorations? They make each popsicle unique and full of joy!
Substitutions & Variations:
- Want to skip the box mix? You can use leftover homemade cake instead .
- Prefer healthier options? Try using yogurt instead of frosting for a tangy twist .
- No candy melts? Melt regular chocolate chips and add a bit of coconut oil to make them smoother.
- Use different flavors of frosting and cake mix to create fun combos—like mint cake with green frosting!
Step-by-Step Instructions
Let’s turn those ingredients into magic!
Step 1: Bake the Cake
Follow the instructions on your cake mix box to bake a small cake. Let it cool completely. If you’re using leftover cake, that works too! Just break it into small pieces.
Step 2: Crumble the Cake
Place the cooled cake in a large bowl. Use your hands or a fork to crush it into fine crumbs. The finer the crumbs, the easier it will be to roll later.
Step 3: Mix in Frosting
Add the frosting to the cake crumbs. Mix gently until everything comes together like wet sand. You should be able to squeeze the mixture into a ball without it falling apart. If it feels too dry, add a tiny bit more frosting. Too sticky? Add a few more crumbs.
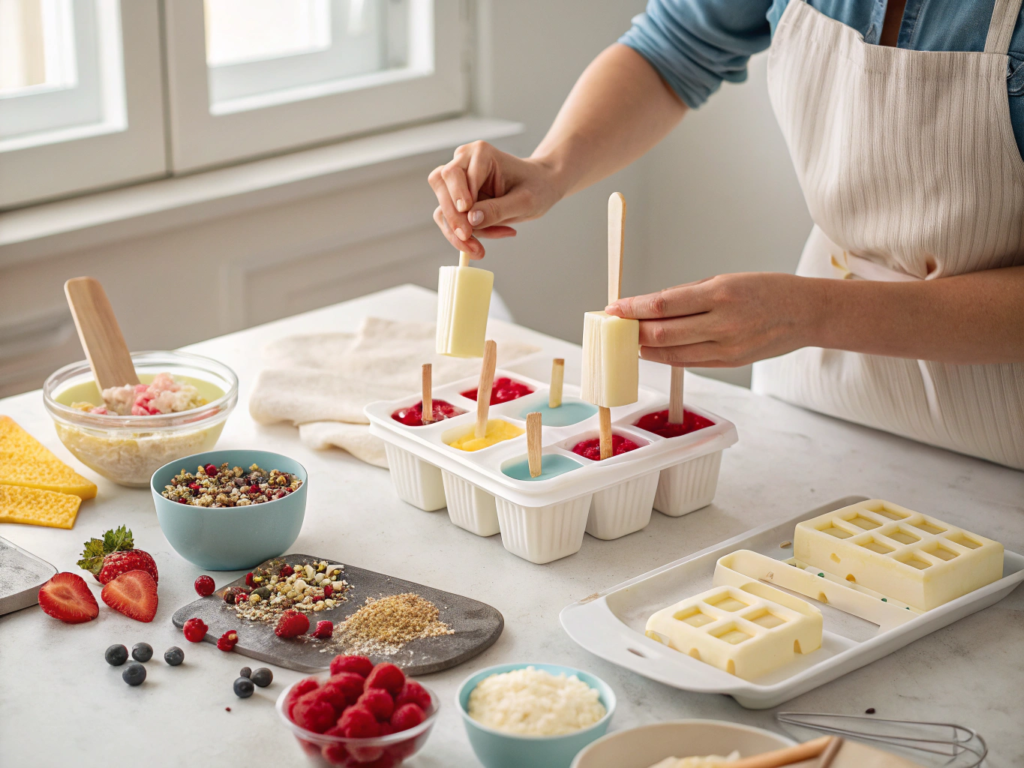
Step 4: Shape the Pops
Grab a spoon or small scoop and form the mixture into small balls—about the size of a golf ball. Then, press a lollipop stick into the center of each ball. Make sure it’s secure and standing straight.
Step 5: Chill the Shapes
Place the shaped pops on a tray lined with parchment paper. Put them in the freezer for 15–20 minutes. This helps them firm up so they won’t fall apart during dipping.
Step 6: Melt the Chocolate
While the pops chill, melt the candy melts in a microwave-safe bowl. Heat in 30-second bursts, stirring between each, until smooth and shiny. Don’t overheat—this can cause the chocolate to burn.
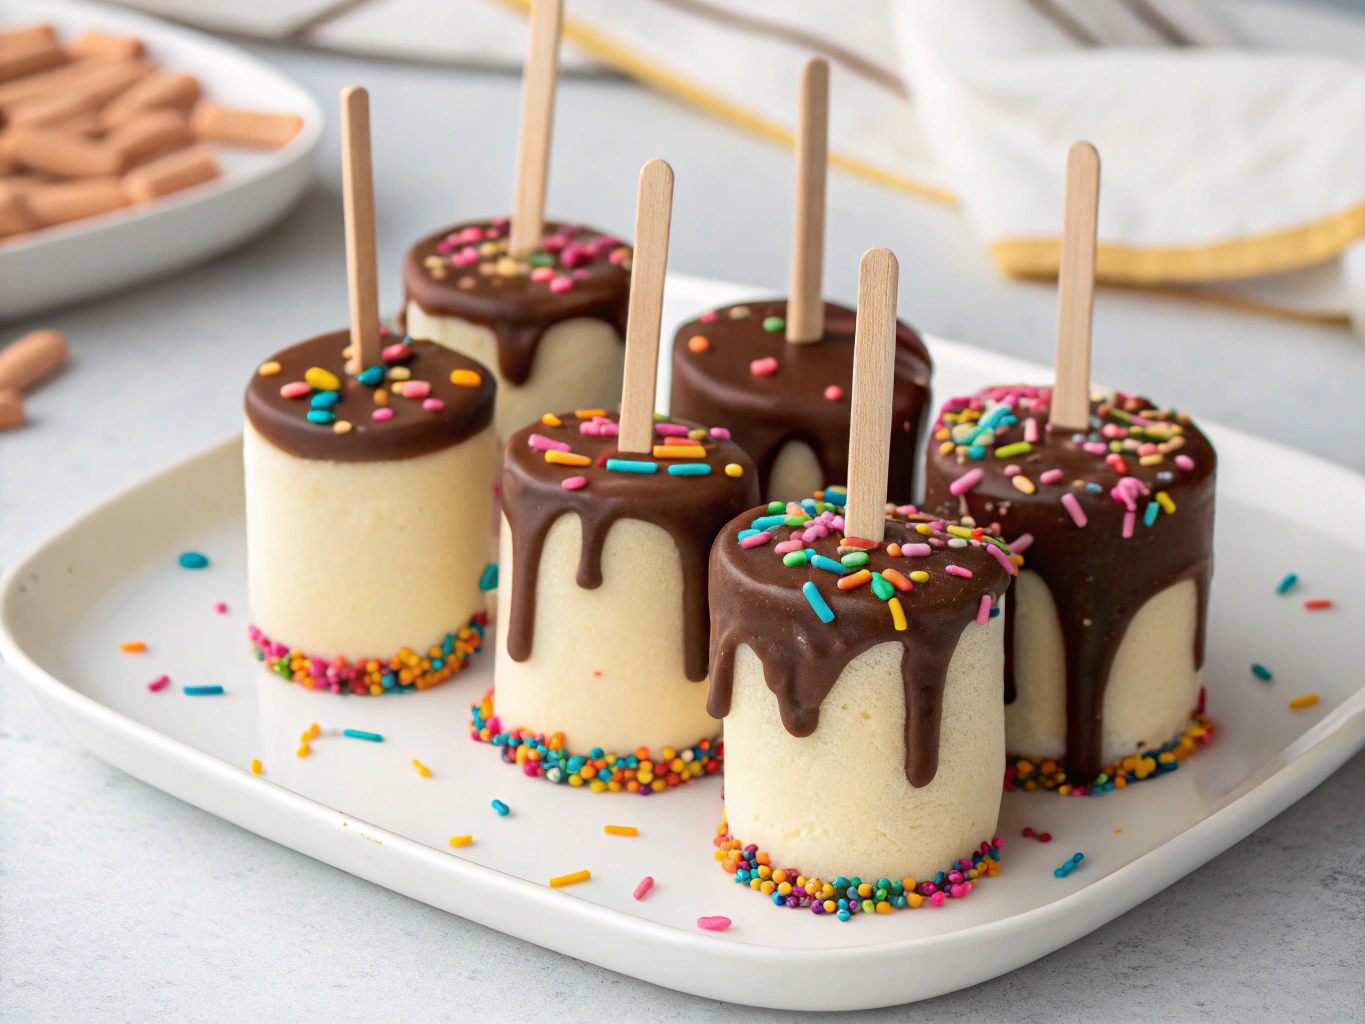
Step 7: Dip and Decorate
Remove the pops from the freezer. One at a time, dip each pop into the melted chocolate, letting the excess drip off. Place it back on the tray. While the chocolate is still wet, add your favorite decorations—sprinkles, crushed cookies, mini marshmallows, or even tiny gummy bears!
Step 8: Let Them Set
Leave the pops at room temperature for 10–15 minutes, or refrigerate for faster setting. Once the chocolate is hard, they’re ready to eat!
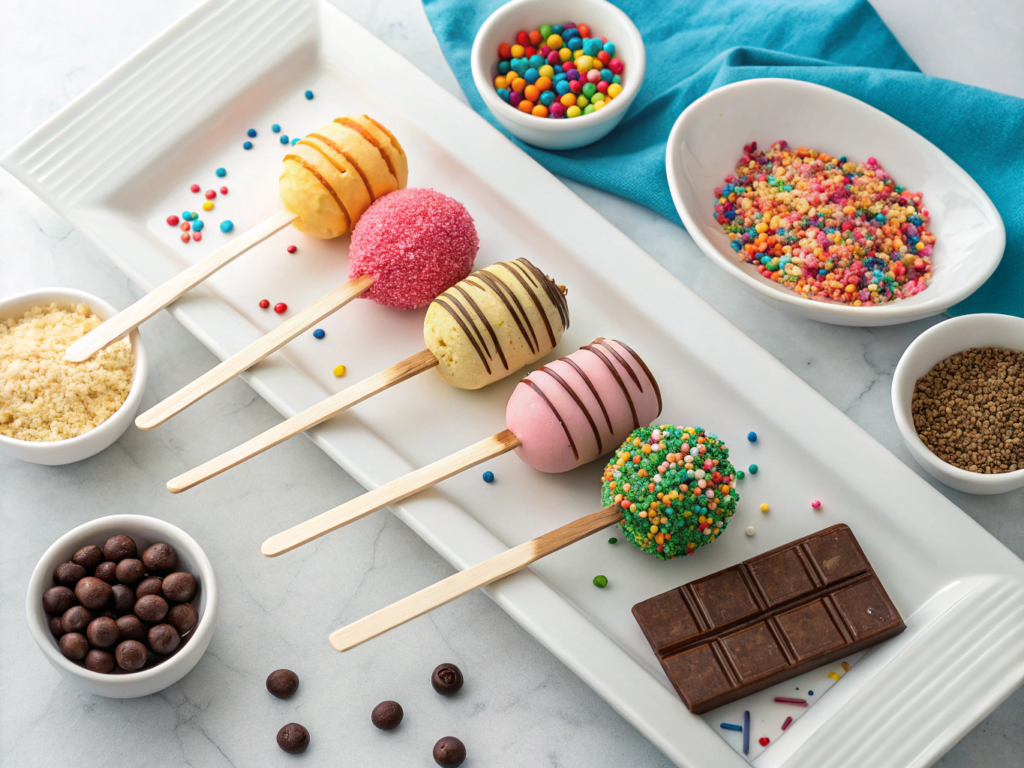
6 Fun Decorating Ideas for Kids
Now comes the most exciting part—making your cake popsicles recipe look amazing! Here are 6 fun ideas kids love:
- Rainbow Sprinkle Pops – Use a mix of bright rainbow sprinkles. Let kids pick their favorite colors!
- Birthday Party Theme – Add small star-shaped candies or confetti for a festive touch.
- Animal Faces – Use two chocolate chips for eyes, a piece of red licorice for a mouth, and a dot of icing for a nose. Turn them into cute bunnies or cats!
- Ice Cream Sundae Style – Top with whipped cream (use frosting) and a cherry on top. Add chocolate drizzle for extra flair.
- Seasonal Fun – For Halloween, use orange and black candy; for Valentine’s Day, go pink and red with heart-shaped sprinkles.
- Superhero Pops – Use foil wrappers from candies as “cape” shapes and draw a face with edible markers.
These ideas are not just fun—they help spark creativity and build confidence in young chefs. Plus, every kid will feel proud showing off their masterpiece!
Tips for Success
- Keep things clean: Have a damp cloth nearby to wipe sticky fingers.
- Use cookie cutters: Press the cake mixture into small molds before adding sticks for even shapes.
- Double-dip for thicker coating: If the first layer isn’t thick enough, dip again after it sets.
- Store properly: Keep pops in an airtight container in the fridge for up to 3 days.
Final Thoughts
Making a cake popsicles recipe is more than just baking—it’s a chance to laugh, create, and share sweet moments with family and friends. With just a few ingredients and a little imagination, you can turn ordinary cake into extraordinary treats. Whether it’s a birthday party, a rainy day activity, or a surprise snack, these popsicles bring smiles all around.
So grab your cake mix, frostings, and colorful sprinkles—your kitchen is about to become a fun factory of deliciousness! Try this recipe today and discover why everyone loves it.